Happy Harvest Spicy Familia!
Here's hoping this finds you and your loved ones in good health and good spirits. As Thanksgiving approaches we can't help but reminisce about all of the beautiful memories we have made this year and are grateful for. We have selected a couple of fun recipes for you to try at home. We hope you enjoy them as much as we have.
God Bless You All,
Nereida
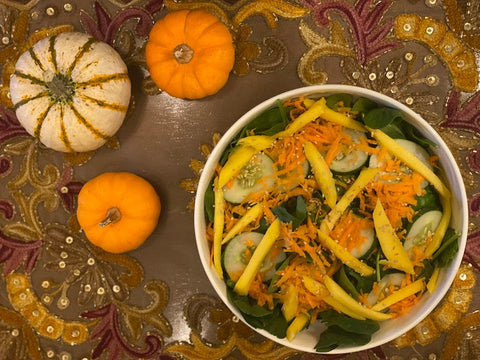
Asian Salad with Ginger Vinaigrette
Ingredients
1. cup shelled edamame, frozen
4 cups packed baby spinach
2 cups watercress (thin stems and leaves only)
2 carrots, peeled and julienned
4 broccoli stems, peeled and julienned
1 green mango, peeled and julienned 1 medium cucumber, thinly sliced
Ingredients for Vinaigrette
1 garlic clove, minced
2 teaspoons agave nectar
3 tablespoons rice vinegar
1 tablespoon Spicy Caribbee Savory Ginger
Directions for the Salad
Start by cooking edamame according to package instructions. Place all the salad ingredients (including the cooked edamame) in a bowl, drizzle with the dressing and toss. Garnish with sesame seeds and serve.
Directions for the Vinagrete
Combine all the ingredients in the blender and blend until smooth. Reserve.

Mini Pumpkin Pies
Ingredients for Pie Crust
2 and 1/2 cups all-purpose flour
1 teaspoon salt
6 tablespoons unsalted butter, chilled and cubed
3/4 cup vegetable shortening chilled
1/2 cup ice water
Ingredients for Filling
1 and 1/4 cups pumpkin puree*
3/4 cup packed light or dark brown sugar
1/2 cup heavy cream
1/4 cup whole milk
1 large egg
1/4 teaspoon salt
1 teaspoon Spicy Caribbee Ground Cinnamon
Directions for Pie Crust
1. Mix the flour and salt together in a large bowl. Add the butter and shortening.
2. Using a pastry cutter or two forks, cut the butter and shortening into the mixture until it resembles coarse meal (pea-sized bits with a few larger bits of fat is OK)
3 Measure 1/2 cup of water in a cup. Add ice. Stir it around. From that, measure 1/2 cup water since the ice has melted a bit. Drizzle the cold water in one tablespoon at a time, and stir with a rubber spatula or wooden spoon after every tablespoon added. Stop adding water when the dough begins to form large clumps. Do not add any more water than you need.
4. Transfer the pie dough to a floured work surface. The dough should come together easily and should not feel overly sticky. Using floured hands, fold the dough into itself until the flour is fully incorporated into the fats. Form it into a ball. Cut dough in half. Flatten each half into 1-inch thick discs using your hands.
5. Wrap each tightly in plastic wrap. Refrigerate for at least 2 hours and up to 5 days.
6 When rolling out the chilled pie dough discs to use in your pie, always use gentle force with your rolling pin. Start from the center of the disc and work your way out in all directions, turning the dough with your hands as your go. Visible specks of butter and fat in the dough are perfectly normal and expected!
7. Shape the mini crusts. Working with one chilled pie dough at a time place the dough onto a floured work surface. Roll into a large 12-inch circle. Use your warm hands to mold any cracking edges back together if needed. From the circle, using your 1/3 cup measuring cup cut out rounds. You'll have to re-roll the dough scraps a few times. Work quickly, as the dough becomes much more delicate the longer it's at room temperature. You'll get about 24 rounds per pie crust. Repeat with second chilled pie dough for a total of about 48.
Directions for Filling
1. In a large bowl with a handheld or stand mixer fitted with whisk attachment or simply using a whisk and mixing bowl-beat/whisk the pumpkin, brown sugar, heavy cream, milk, egg, salt, and cinnamon together (on medium high speed if using a mixer) until completely combined, about 2 minutes. You'll have about 3 cups of filling. Cover and refrigerate filling until pie crusts are shaped and ready.
2. Preheat oven to 375 F. Grease two 24-count mini muffin pans. Nonstick spray is best. (If you only have one mini muffin pan, bake these in batches. Roll out first pie dough, shape, fill and bake then roll out the 2nd pie dough, shape, fill, and bake.)
3.Place the dough rounds into greased 24-count mini muffin pan(s). Press the dough flat into the bottom of the crevice and up the sides.
4.Evenly spoon cold filling into each unbaked crust, filling to the top. 5.Bake mini pies until the center is just about set and edges are lightly browned, about 21-25 minutes. Allow to cool for 5 minutes before removing from the pan. If greased well, the mini pies pop right out using a spoon to scoop them up. Cool, then serve at room temperature or refrigerate until chilled and serve cold. Filling deflates a bit as they cool.
6. Top with whipped cream and enjoy!
|